This article explains how to migrate to the latest KiviCare version (4.0.0) and how to rollback to an older version if needed.
IMPORTANT: Take a Full Backup Before Updating
Before upgrading KiviCare to a new version, it is strongly recommended to take a complete backup of your website.
🔐 What Should Be Backed Up?
- WordPress database
wp-contentfolder- KiviCare plugin files
- Any custom code or overrides
💡 You can use popular backup plugins or your hosting provider’s backup tool to create a full backup.
This ensures that you can safely restore your site if anything goes wrong during the update or migration process.
Migration to KiviCare 4.0.0
Migrating to the latest version of KiviCare is simple and safe when proper backups are in place.
🧩 Step 1: Update KiviCare Plugin
- Go to WordPress Admin → Plugins → Installed Plugins
- Find KiviCare – Clinic Management System
- Click Update
- Make sure the plugin version is 4.0.0
KiviCare automatically prepares database migrations when the latest version is activated.
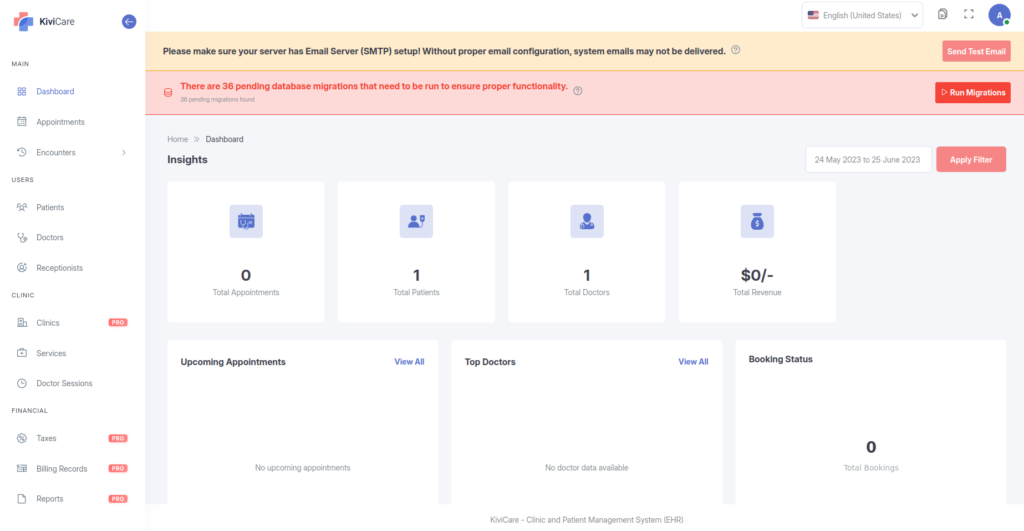
🖥️ Step 2: Run Database Migration
After updating the plugin:
- Go to KiviCare → Dashboard
- You will see a migration notice at the top of the dashboard
- Click Run Migrations
- Wait until the migration process completes
Once finished, your system is fully upgraded and ready to use 🎉
Migration Notes
- Database migrations usually run automatically on plugin activation
- If migrations remain pending, you can manually run them from the dashboard
- The migration notice will disappear automatically once all migrations are completed
Rollback to an Older KiviCare Version
If you experience any issues after upgrading, you can rollback to a previous version of KiviCare.
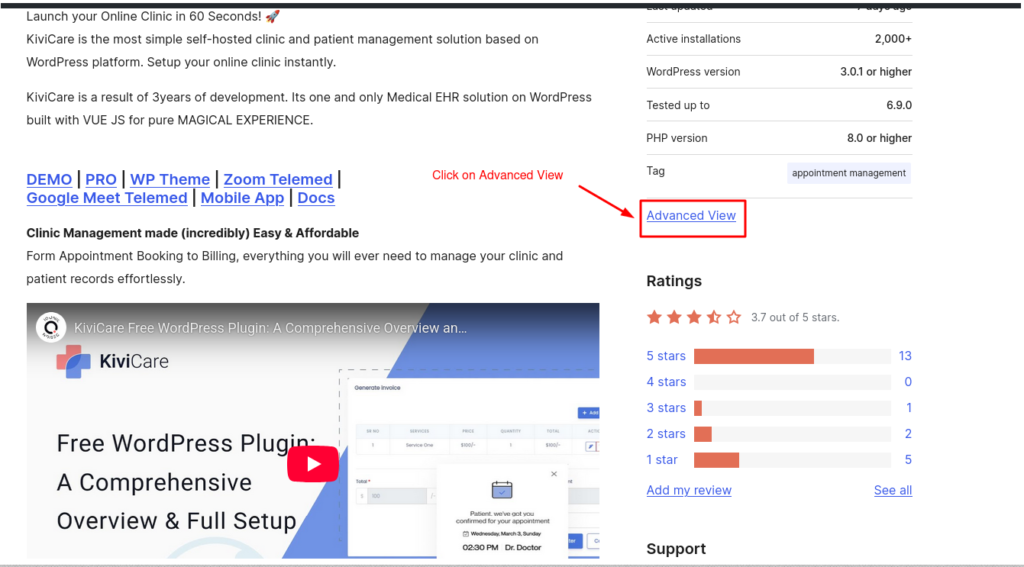
📥 Step 1: Download an Older Version
- Visit the official WordPress plugin page:
👉 https://wordpress.org/plugins/kivicare-clinic-management-system/ - Scroll down to the Advanced View section
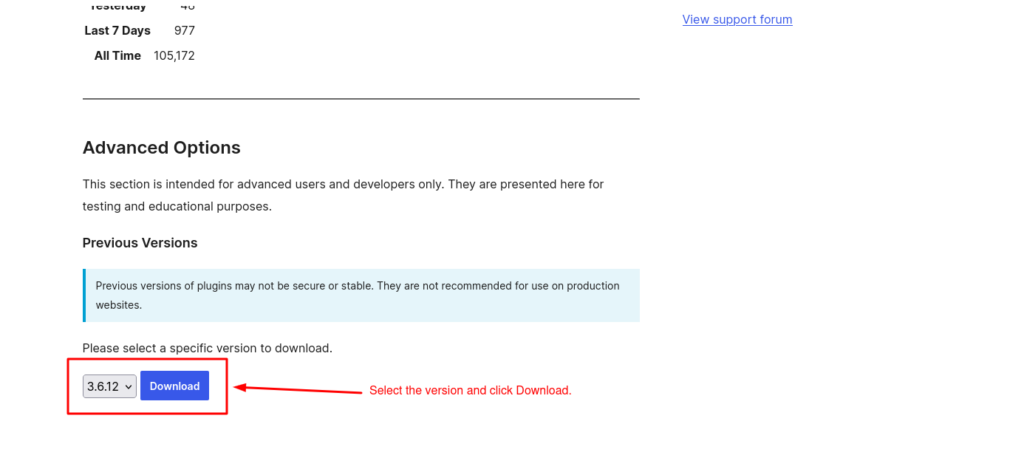
- Find Previous Versions
- Select the required version
- Click Download
🔧 Step 2: Install the Older Version
- Go to WordPress Admin → Plugins
- Deactivate the current KiviCare plugin
- Click Add New → Upload Plugin
- Upload the downloaded ZIP file
- Click Install Now and then Activate
Rollback Notes
- Always keep a backup before rolling back
- Rolling back may cause data or schema mismatches
- Avoid rolling back on live sites without testing on a staging environment
Language / Translation Migration Note
- Language files and custom translations do not migrate automatically during the KiviCare 4.0.0 update.
- If you are using a translated version of KiviCare (via Loco Translate, WPML, Polylang, or custom
.po/.mofiles), you will need to re-sync or re-generate translations after migration. - Plugin updates may overwrite existing language files inside the plugin directory.
⚠️ Important:
Language migration is manual. KiviCare does not migrate or preserve custom translations automatically during version upgrades.
Need Help?
If you face issues during migration or rollback:
- Verify server requirements
- Check error logs
- Share screenshots of the migration notice
- Contact KiviCare support for assistance
✅ Done!
With proper backups in place, you can.