This comprehensive guide covers everything you need to know about Doctor Dashboard & Features in KiviCare Lite. Whether you’re a beginner or an advanced user, this documentation will help you understand and implement this feature effectively.
Overview
Doctor Dashboard & Features is an essential component of the KiviCare EHR system, designed to streamline healthcare management processes. This feature integrates seamlessly with other modules to provide a comprehensive solution for medical practices.
Key Features
Easy to use and intuitive interface
Seamless integration with existing workflows
Comprehensive data management capabilities
Real-time updates and notifications
Customizable settings and configurations
Getting Started
To begin using Doctor Dashboard & Features, follow these simple steps:
Navigate to the appropriate section in your KiviCare dashboard
Configure the necessary settings according to your requirements
Test the functionality to ensure everything works as expected
Train your staff on how to use this feature effectively
Doctor Dashboard
Your dashboard is your command center, offering a quick snapshot of your day and long-term trends.
Key Dashboard Elements
Upon logging in, you’ll see:
Statistics Cards: At-a-glance metrics tailored to you, including: Total appointments assigned to you. Number of unique patients you’ve treated. Active services you offer. Today’s scheduled appointments.
Appointment Calendar: An interactive view of your schedule—click dates to zoom in or out.
Upcoming Appointments List: A scrollable list of near-term visits, with patient names and times for easy preparation.
Refresh the page anytime for the latest updates. Mobile-friendly design ensures access from tablets or phones.
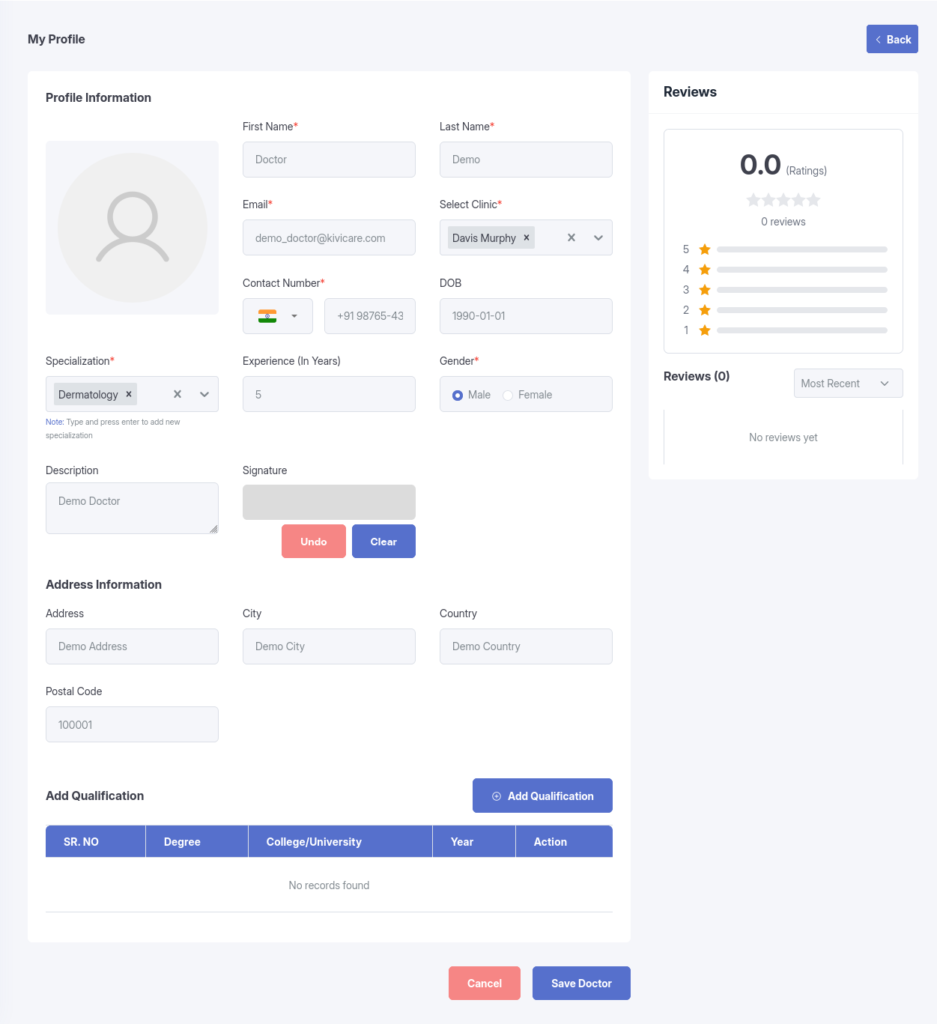
Profile and Account Management
Keep your information current.
Updating Your Profile
Go to Profile in the menu.
Edit details: Name, specialization, qualifications, or photo.
Save—changes reflect across the system.
Changing Password
In Profile settings, select “Change Password.”
Enter old and new details.
Confirm for enhanced security.
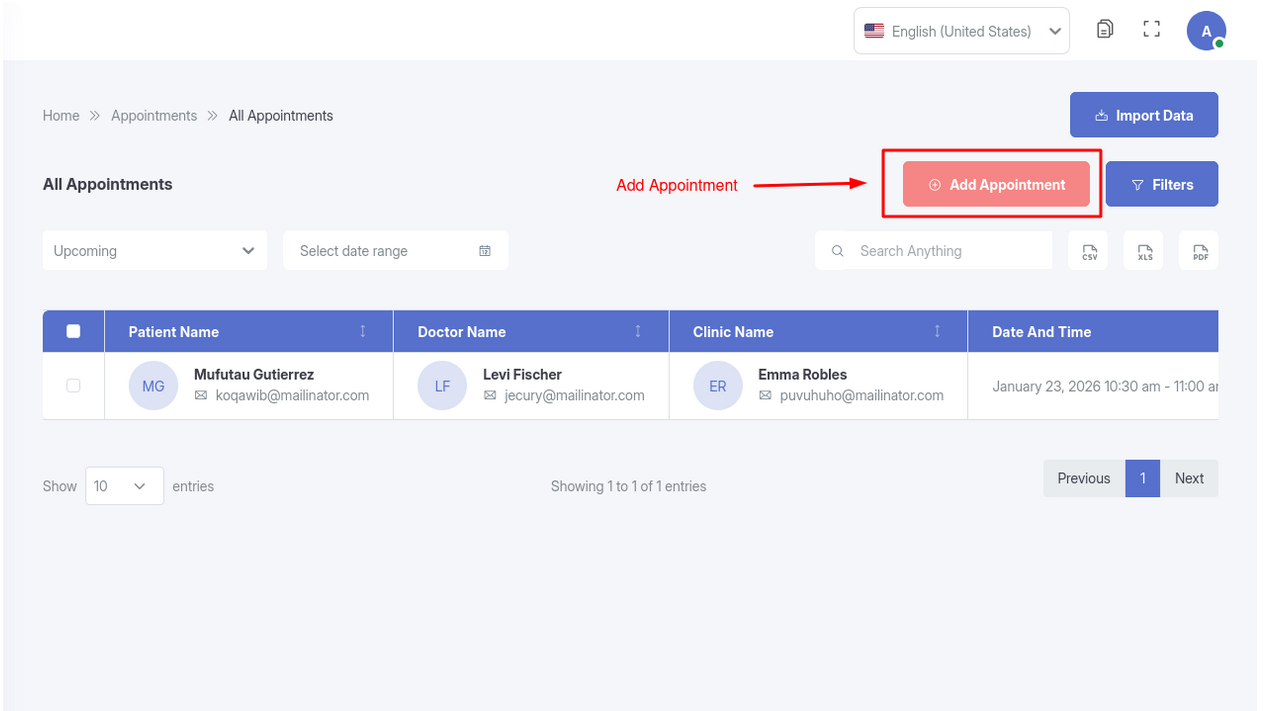
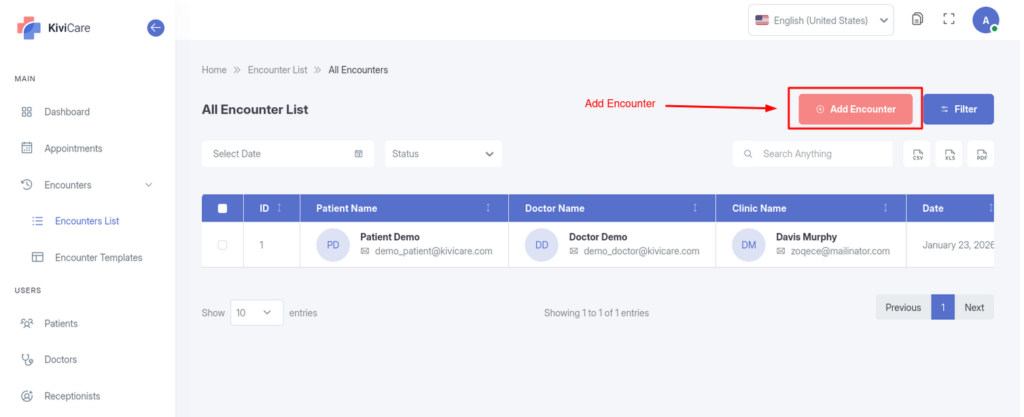
Managing Appointments
Efficiently handle your schedule to focus on patient care.
Viewing and Filtering Appointments
Browse your full appointment list in a clear table format.
Filter by patient name, date, or status to find specifics quickly.
Search using keywords like a patient’s name or service type.
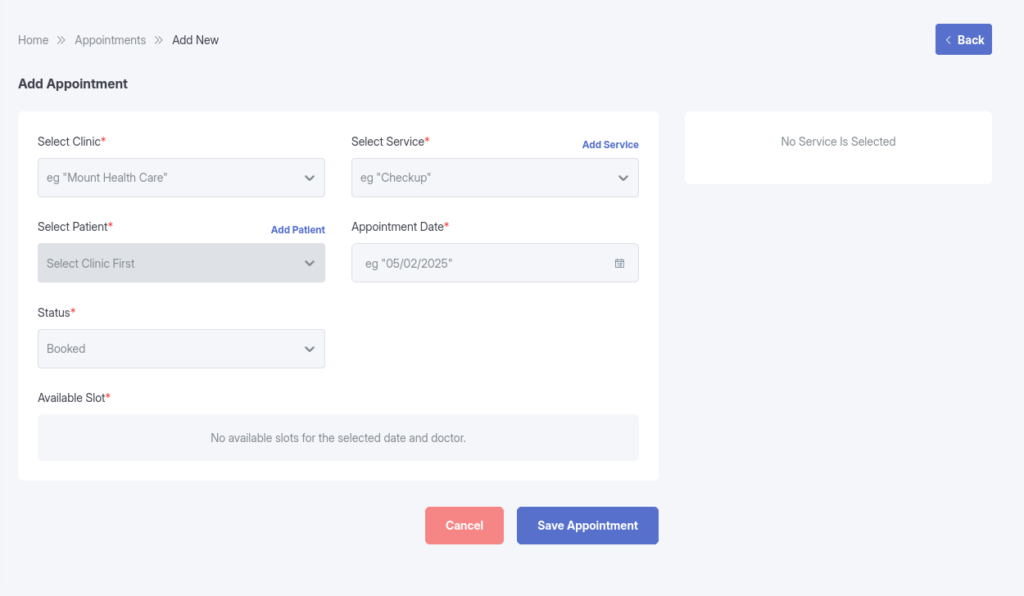
Creating a New Appointment
From the Appointments section, select “Add New Appointment.”
Choose the patient (or search/add a new one).
Select the service and set the date/time based on your availability.
Add any notes or special instructions.
Save—the appointment appears on your calendar and notifies the patient.
Editing or Viewing Details
Open an appointment from the list or calendar.
Review details in read-only mode or click “Edit” to adjust time, service, or notes.
Save changes; the system updates all involved parties.
Tracking Appointment Status
Keep tabs on progress with these statuses:
Booked: Your appointment has been successfully reserved in the system.
Pending: The appointment is in review, often waiting for doctor or clinic approval before it’s fully set.
Check In: You’ve arrived at the clinic and checked in—staff will guide you from here.
Check Out: The visit is wrapping up; this status appears after your session ends, often with notes added.
Cancelled: The appointment is no longer active.
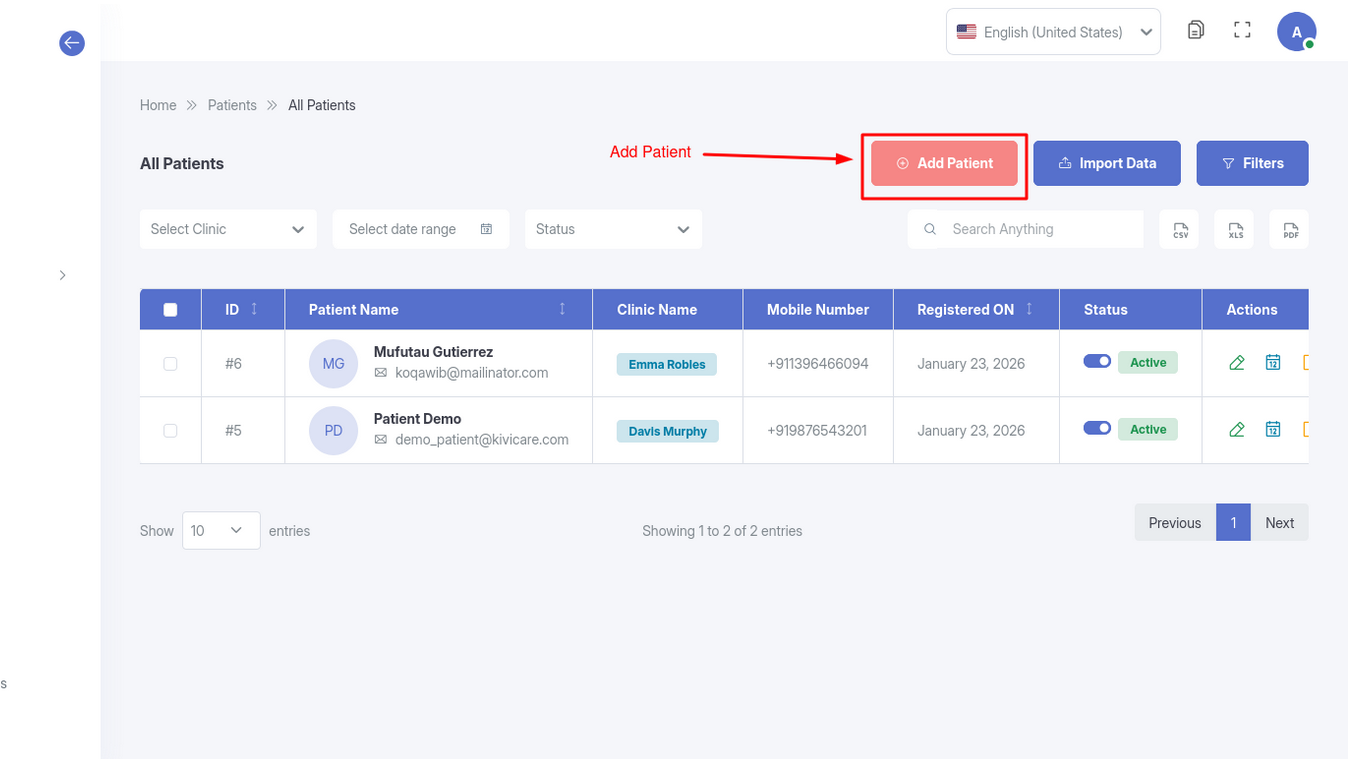
Patient Management
Access and update patient information securely.
Viewing Patient List
See a searchable list of all patients you’ve treated.
Sort by name, last visit, or other criteria.
Accessing Patient Profiles
Select a patient from the list.
View tabs for personal details, medical history, and past encounters.
Review summaries of conditions, allergies, and medications.
Editing Patient Information
In the profile, click “Edit.”
Update contact info, medical notes, or address as needed (with patient consent).
Save—the changes sync across the system.
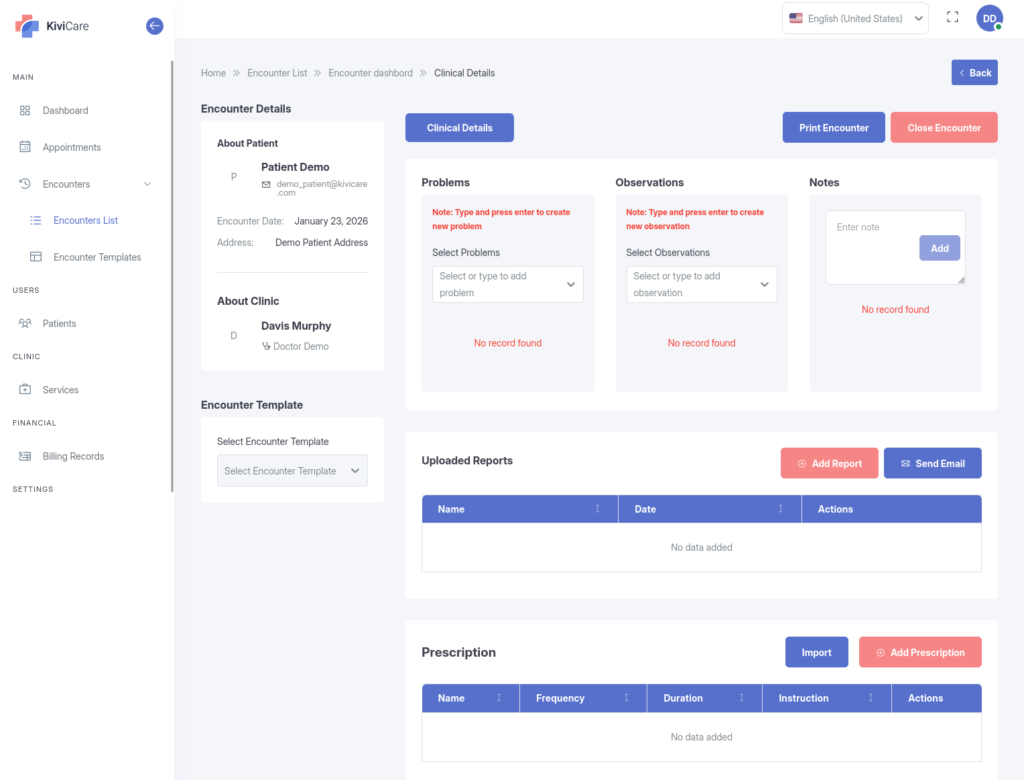
Encounter Management (Clinical Records)
Document visits thoroughly to build comprehensive patient histories.
Creating an Encounter
From the Encounters section, choose “Add New Encounter.”
Select the patient and link to the relevant appointment.
Fill in sections: medical history, observations, and findings.
Key Encounter Components
Clinical Details: Record symptoms, diagnoses, and treatment plans.
Prescriptions: Add medications with dosage and instructions (see Section 10 for details).
Medical Reports: Attach or create reports like lab results.
Body Chart: Visually mark areas of concern—draw, annotate, and save diagrams.
Editing or Viewing Encounters
Open an existing encounter.
Edit details or add follow-ups.
View in a multi-tab layout for organized access.
Export summaries for records.
Prescriptions in Encounters
Streamline medication management.
During an encounter, open the Prescription module.
Search/add drugs, set dosage/frequency, and add instructions.
E-sign and save—patients receive digital copies via notifications.
Refills can be tracked in patient profiles.
Encounters auto-link to appointments and update patient histories.
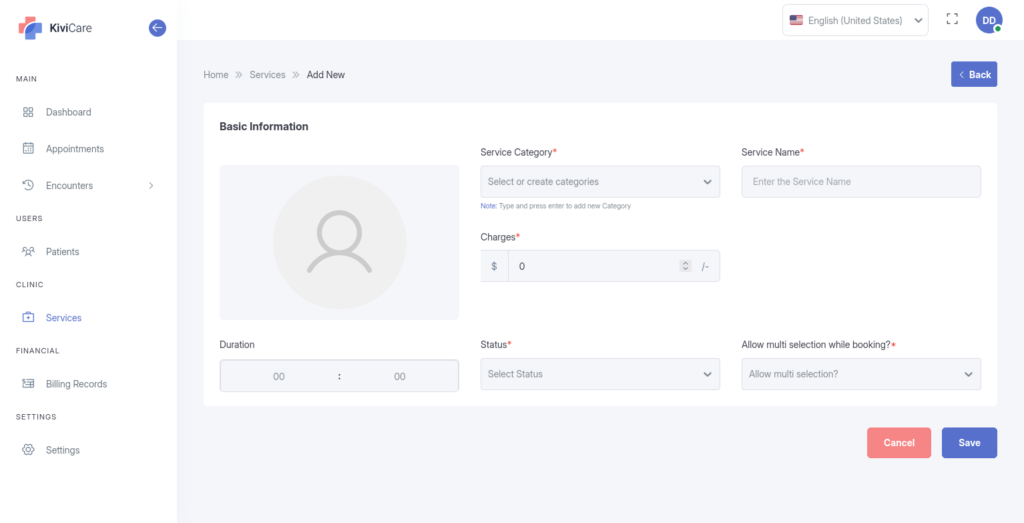
Services and Sessions Management
Define what you offer and when you’re available.
Managing Services
View your list of services (e.g., consultations, check-ups).
Add new ones: Enter name, description, and pricing.
Edit or organize as your practice evolves.
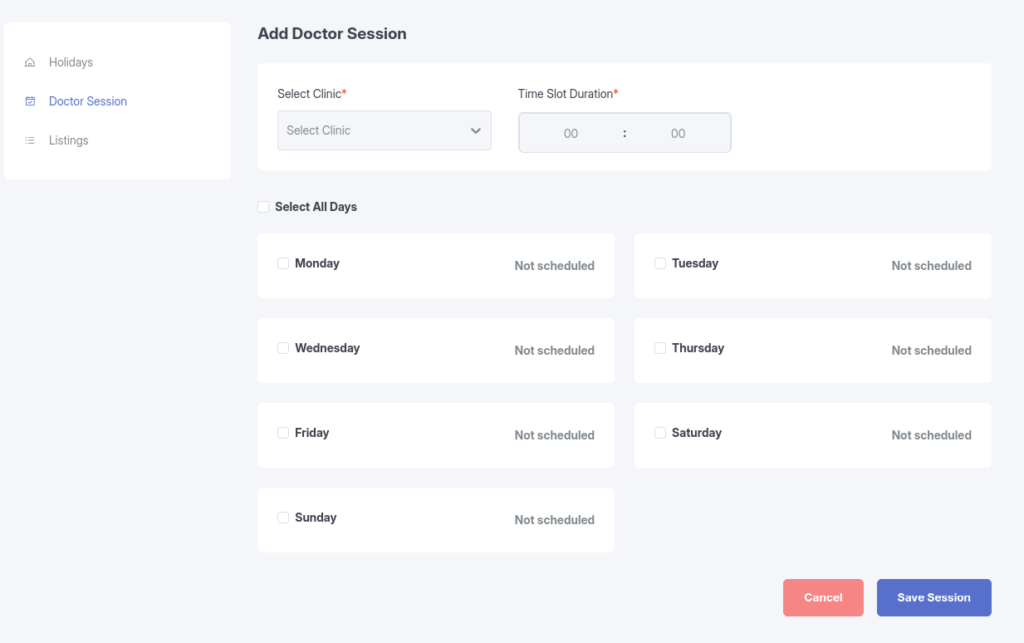
Scheduling Sessions
Go to Setting -> Doctor Sessions in the menu.
Click “Add Session.”
Set recurring times, duration, and breaks.
Save—availability integrates with the calendar to prevent overlaps.
Update sessions regularly to reflect your current schedule.
Settings and Configurations
Personalize your tools
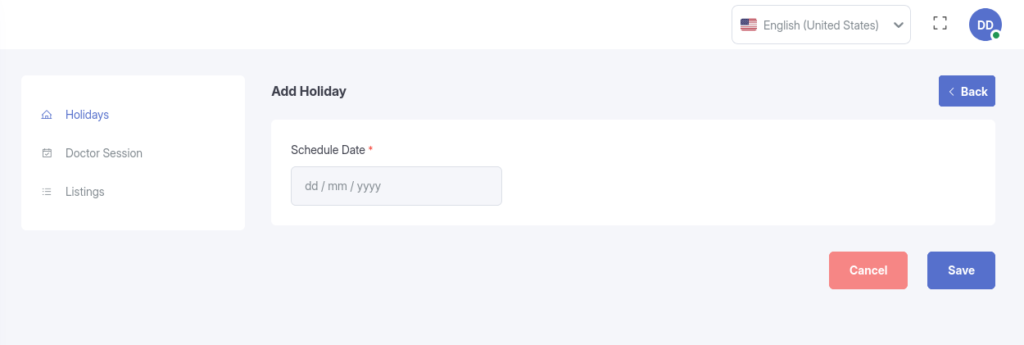
Holiday Settings
Mark holidays: Select dates and reasons—the system blocks bookings automatically.
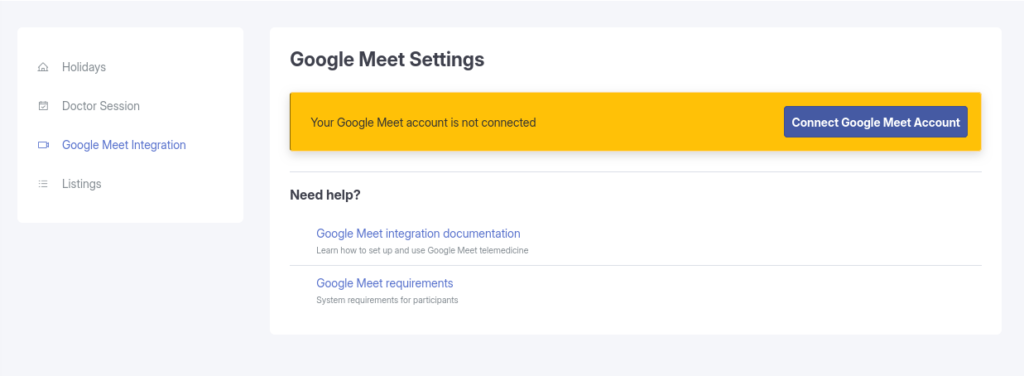
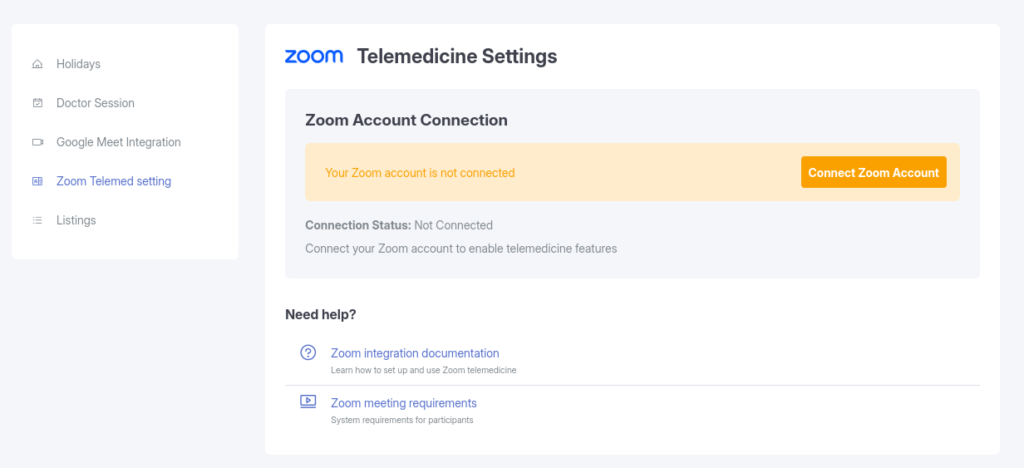
Telemedicine Setup(Available in Google Meet and Zoom Addon)
Google Meet: Configure your account for video calls—enable for seamless virtual appointments.
Zoom: Set up credentials to host secure video consultations.
Navigate to Telemedicine Settings.
Enter integration details.
Test and enable—the option appears in appointment creation.
Billing and Revenue
Track finances without hassle.
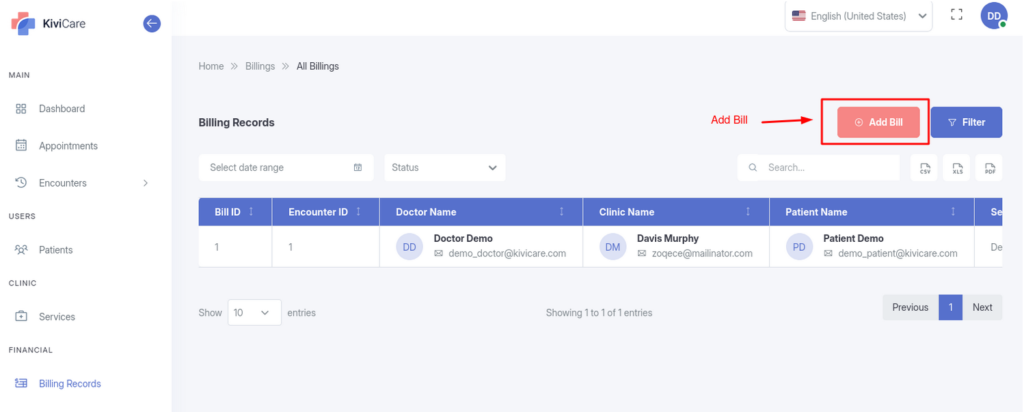
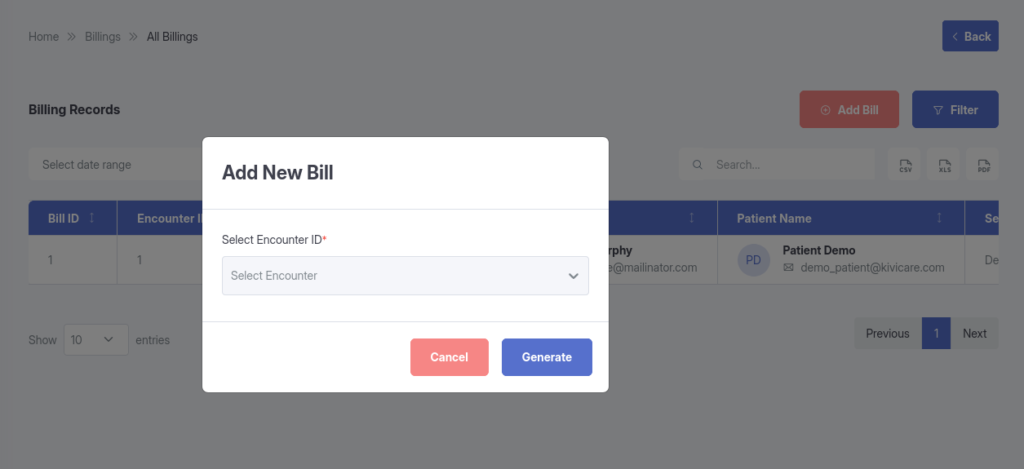
Viewing Bills
Access a list of invoices linked to your encounters.
Review details: Services, totals, payments, and balances.
Filter by patient or date.
Managing Payments
See payment history and outstanding amounts.
Generate invoices during or after encounters.
Billing integrates with encounters for automatic charge capture.
Data Export and Import
Maintain flexible record-keeping.
Export appointments, patient lists, or reports in CSV, Excel, or PDF.
Import bulk data (e.g., new patient lists) for efficiency.
Generate printable summaries for compliance.
Use exports for backups or insurance submissions.
Best Practices
To get the most out of Doctor Dashboard & Features, consider implementing these best practices:
Regular Updates: Keep your system updated to access the latest features and security patches
Staff Training: Ensure all users are properly trained on the functionality
Data Backup: Regularly backup your data to prevent loss
Documentation: Maintain internal documentation of your specific configurations
Troubleshooting
If you encounter any issues with Doctor Dashboard & Features, try the following troubleshooting steps:
Clear your browser cache and cookies
Verify that you have the necessary permissions
Check for any plugin conflicts
Review the system logs for error messages
Contact support if the issue persists
Related Resources
For more information about Doctor Dashboard & Features and related features, check out these additional resources:
KiviCare Video Tutorials
Community Forum Discussions
Official Documentation Portal
Support Ticket System
Conclusion
Doctor Dashboard & Features is a powerful feature that enhances your KiviCare EHR experience. By following this guide and implementing the best practices outlined above, you’ll be able to leverage this functionality to its full potential. If you need further assistance, don’t hesitate to reach out to our support team.