Create unlimited, fully customizable forms for patients, doctors, appointments, and encounters using KiviCare Pro’s powerful Custom Forms Builder—no coding required.
Overview
The Custom Forms Builder is one of the most flexible features in KiviCare Pro. It allows clinics to collect structured, accurate data across different workflows without modifying core code.
What You Can Create
Patient intake and registration forms
Doctor credential and profile forms
Appointment questionnaires
Clinical encounter documentation
Pre-consultation screening forms
Post-treatment feedback forms
Key Features
Unlimited custom forms
10+ configurable field types
Easy drag-and-drop form builder
Required field validation
Conditional logic (coming soon)
Export form data to CSV/Excel
Module-specific form integration
Fully mobile-responsive design
Available Field Types
Text-Based Fields
1. Text Input Single-line text field
Ideal for names, IDs, and short answers
Options: placeholder text, default value, maximum length
2. Textarea Multi-line text input
Best for medical history, notes, and descriptions
Options: number of rows, placeholder text
3. Email Validated email input
Ensures correct email format
Commonly used for contact information
4. Phone Phone number input field
Supports format validation
Ideal for contact numbers
5. Number Numeric-only input
Suitable for age, weight, height, or measurements
Options: minimum, maximum, and step values
Selection Fields
6. Dropdown (Select) Single option selection from a list
Useful for categories such as blood type or gender
Supports default selection
7. Radio Buttons Single selection with visible options
Best for Yes/No or small option sets
Provides better usability than dropdowns
8. Checkboxes Multiple selections allowed
Ideal for symptoms, allergies, or conditions
Supports default checked options
Special Fields
9. Date Picker Calendar-based date selection
Used for birth dates, procedures, or events
Supports date format and min/max limits
10. File Upload Upload documents or images
Ideal for reports, ID cards, or insurance documents
Options: file types and size limits
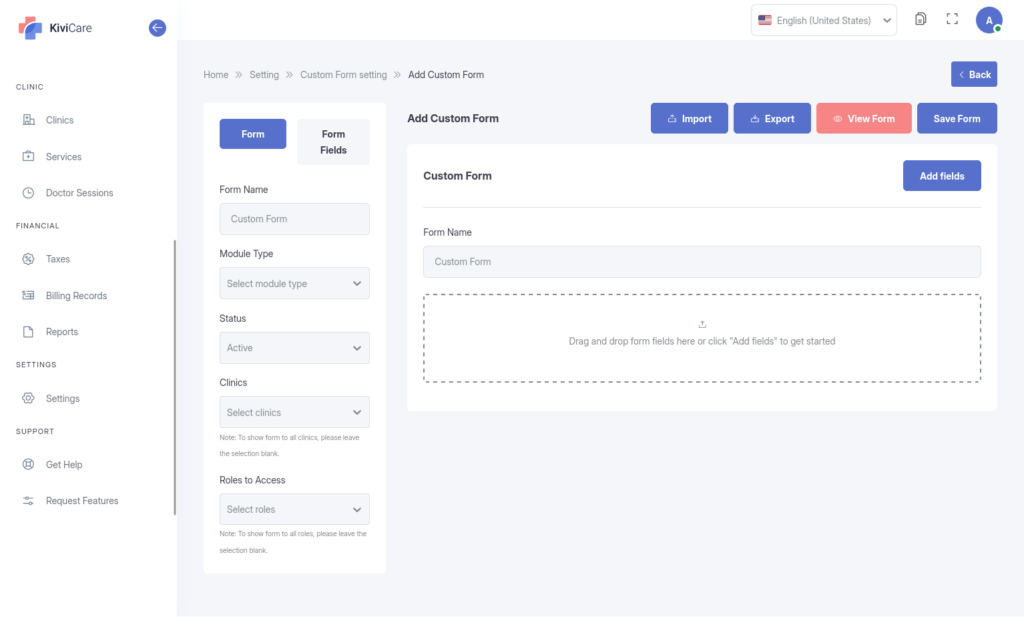
Creating Your First Custom Form
Step 1: Open the Form Builder
Go to Settings → Custom Forms
Click Add New Form
Step 2: Configure Basic Form Details
JAVASCRIPT
Form Name: New Patient Intake Form
Description: Comprehensive intake form for new patients
Module Type: Patient Module
Status: Active
12345
Module Types Explained
Patient Module – Appears while adding or editing patients
Doctor Module – Used for doctor profiles and credentials
Appointment Module – Displayed during appointment booking
Encounter Module – Used inside patient encounters
Step 3: Add Form Fields
Build a complete patient intake form by adding fields one by one.
Examples include:
Known Allergies (Textarea, Required)
Current Medications (Textarea)
Blood Type (Dropdown)
Emergency Contact Details (Text & Phone)
Chronic Conditions (Checkboxes)
Smoking Status (Radio Buttons)
Insurance Information (Text & File Upload)
Each field allows customization such as:
Labels and placeholders
Required or optional status
Validation rules
Display options
Step 4: Review and Publish
Review all fields
Reorder fields using drag-and-drop
Click Save Form
Set status to Active
Click Publish
✅ Your form is now live and ready to use.
Where Custom Forms Appear
Patient Module
Displayed when adding or editing a patient. Form data is saved with the patient profile and can be viewed or edited later.
Doctor Module
Used during doctor creation or profile editing. Ideal for storing licenses, experience, certifications, and affiliations.
Appointment Module
Shown during appointment booking. Useful for pre-appointment questions, symptoms, or screening forms.
Encounter Module
Accessible within patient encounters. Form responses become part of the clinical record.
Form Design Best Practices
Organize Related Fields
Group fields into logical sections such as:
Emergency contact details
Insurance information
Use Clear Labels
Good: “Emergency Contact Phone Number”
Avoid: vague or unclear labels
Helpful Placeholders
Provide examples to guide users and reduce errors.
Required Fields
Mark only essential fields as required
Display clear validation messages
Prevent form submission if required fields are empty
Viewing Form Data
Patient Profiles
Custom form data is visible inside the patient profile, organized by form and submission date.
Appointments
Pre-appointment form responses appear within appointment details.
Encounters
Encounter-specific forms are saved as part of the patient’s medical record.
Exporting Form Data
Export Individual Forms
Choose date range
Export as CSV or Excel
Ideal for backups or reporting
Bulk Export
Export submissions from multiple forms
Generate consolidated reports
Useful for analytics, research, or EMR imports
Editing Existing Forms
What You Can Edit Safely
Add new fields
Change labels or placeholders
Reorder fields
Add dropdown options
Use Caution When
Deleting fields
Changing field types
Removing existing dropdown values
💡 Best practice: duplicate forms before major structural changes.
Real-World Use Cases
Diabetes assessment forms
Pre-operative screening questionnaires
Pediatric growth and vaccination records
Each use case can be tailored to specific workflows using field types and validation rules.
Troubleshooting
Form Not Visible
Ensure form status is Active
Confirm correct module selection
Clear cache and refresh
Required Fields Not Validating
Re-save the field with the required option enabled